Kitchen plans and cabinet doors
It’s good to have a plan. Admittedly, this kitchen adventure started because I didn’t have a plan. I just threw caution to the wind and in the process, created a lot of work for myself. I don’t mind the work part but the no plan part is tough for me. It has me feeling a little lost. My cabinet doors have me feeling a lot lost.
So… I’m trying to make a plan.
The cabinets
The thing I need to focus on most is my cabinet doors.

My cabinets doors aren’t horrible. They are, by no means, modern in appearance but with paint on them, they’re manageable. I no longer feel sick to my stomach like I did when they were dark with nasty, gunk covered handles. They aren’t, however, what I really want. What I really want are Shaker cabinets. I long for those clean, simple lines!!
To get shaker cabinets, I can buy all new cabinets. (No I can’t. $$$$) I can buy all new doors. (I priced one door at 12″ x 27″ and it was almost $40 not including shipping. ) That also seems expensive.
Maybe, I should just live with what I have. Slap a fresh coat of paint on them and call it a day. Maybe… I should try to make new doors. (Did you feel that? My husband just shuddered so ferociously, it caused an earthquake in Ohio.)
A DIY solution
You’ve probably guessed by now that I’m not very good at taking the easy road. Well…. That’s totally in play here. I am trying to make doors. I know. It’s nuts. Don’t worry. I’m not tearing out any cabinet doors just yet. I’m making a few test doors first. The expense is minimal and I get the opportunity to see how challenging it might be before I commit to the whole kitchen. And, I will get to see if they’re sturdy enough for a busy kitchen.
My first attempt isn’t turning out too bad. I started with the simplest way I could think of to make them. We’ll call it ‘Faux Shaker’. When I priced the doors online, they were using MDF. It’s a paintable material and it doesn’t warp. I decided it would be a good place to start my testing and since I had some in the garage from another project, I didn’t have to buy any. Winner!
I had Austin (my oldest son) cut the MDF into 4 door panels. He has some mad table saw skills and I wanted a refresher on using it. I hadn’t used it in a while and wanted to make sure I was safe and using it correctly. Turned out that was smart. We had to change the saw blade and his help there was invaluable!! It really pays to have a kid who built sets for his high school theatre productions. (BIG shout out to the Dublin Scioto theatre department!! He learned so much and made life long friends!)
Test doors
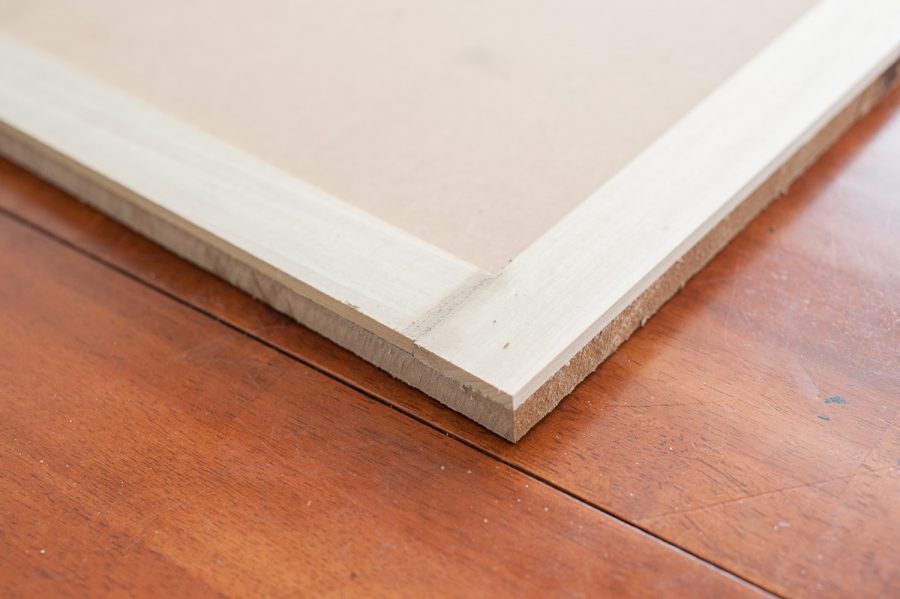
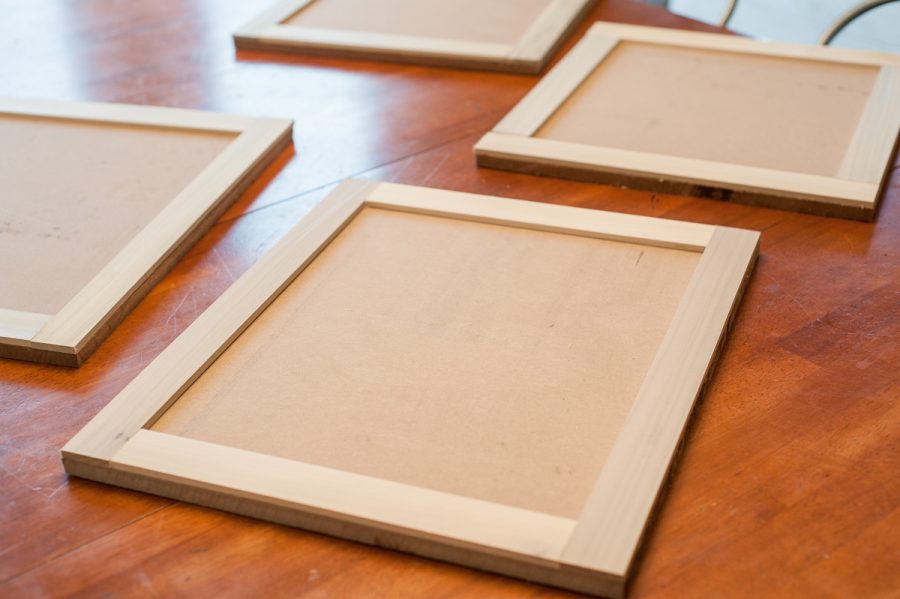
I used the size of my cabinet opening plus 1″ for overlay. (A 14″ x 16″ opening means cutting a 15″ x 17″ piece.) I glued & nailed a piece of what was called “Poplar project board” all the way around to give the panel the Shaker look I like so well. The boards were 1/4″ x 2″ x 4 ft long and cost a little less than $3 each. My test doors (4 of them) cost me less than $20.
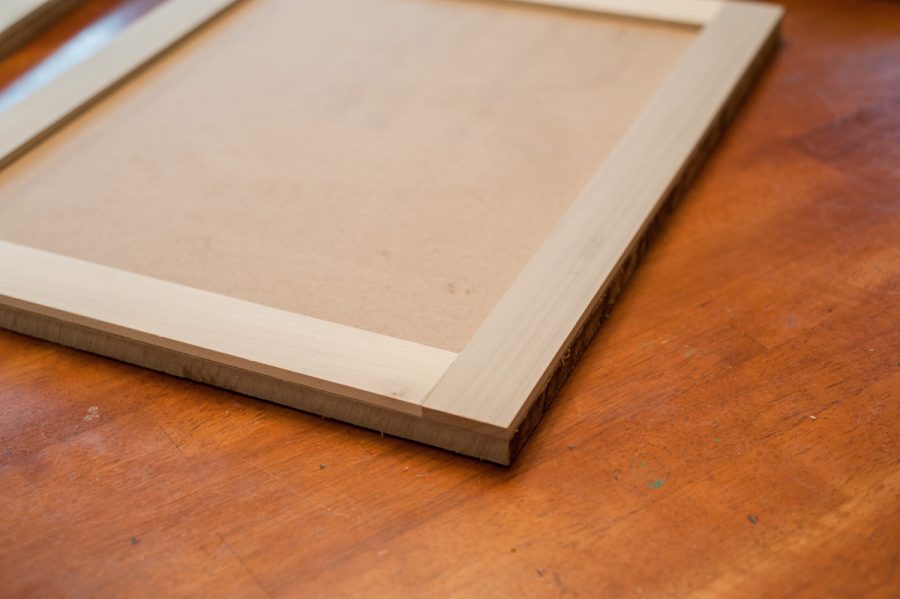
I put a little wood putty between the trim work to hide the seams. I’ll sand that smooth and then they are ready for primer and paint.
Honestly, it’s really simple and even if you add the cost of MDF, they’re super affordable. If you don’t own any power tools, you can still do this. Have your MDF cut at the store and use a hand saw to cut the boards. You may have to do a little more sanding but it will work.
I am pretty happy with how my Faux Shaker doors turned out.
Now I want to try my hand at making a real Shaker door and see how that goes. I’ll keep you posted.
xoxo
Donna
I love having you on the road with me!
PS… If you like what you’re reading, you can subscribe. There’s a sign up in the right hand column. Love having you on the road with me!