DIY Board and batten
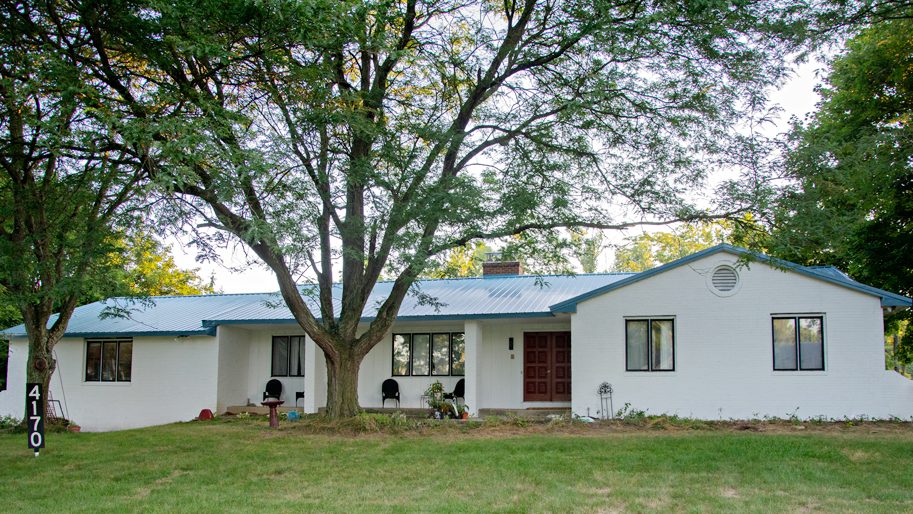
My foyer, part two
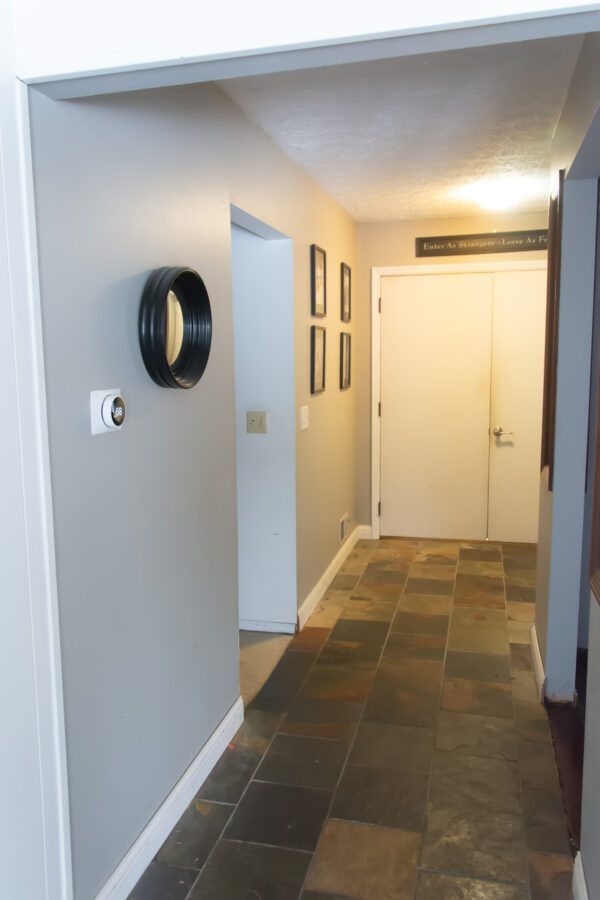
In my last post, I told you about my foyer. It was in desperate need of an update. I had removed the trim and patched the holes, prepping it for an update and I told you I wanted a bold welcome into our house. I shared with you the gorgeous color I’m putting there. Midnight in NY from Behr may be the most lovely shade of blue-green I’ve ever laid eyes on. I love how it brought out the tones in my tile. Due to the dark color, I felt I needed something light to contrast the dark. White DIY Board and batten to the rescue.
Board and batten
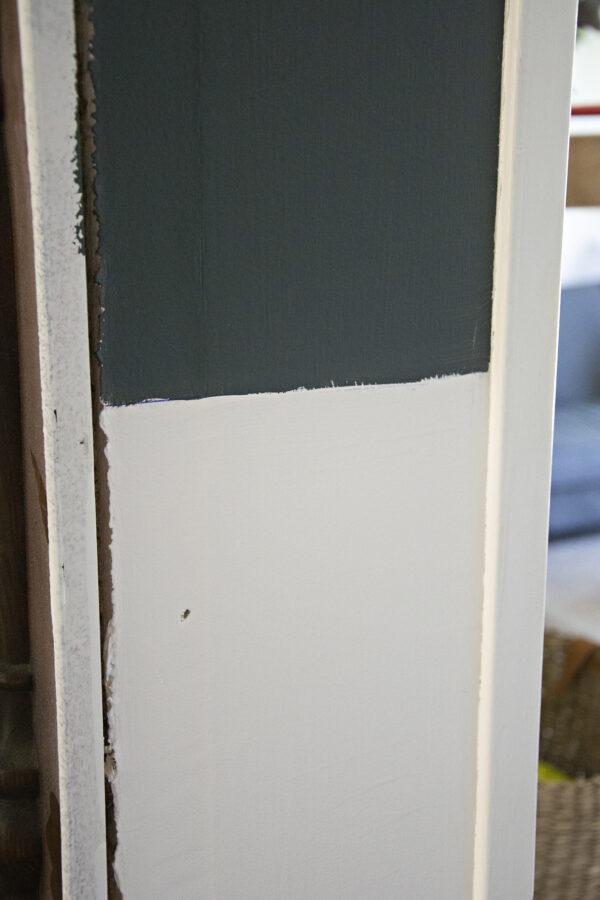
Board & batten is a great way to add architectural interest. You can do it floor to ceiling or just part of the way up. Due to my desire to use two colors, I planned on doing a partial wall but had to determine at what height the board and batten would begin. I made the height decision by using my thermostat as a guide.
Because of the Nest’s height on the wall and its white rectangular base, I thought it would be the perfect height for the top board. I drew a level line at this height all around the room. I painted Midnight in NY on top and Snowbound from Sherwin Williams on the bottom.
The pieces that make up board & batten
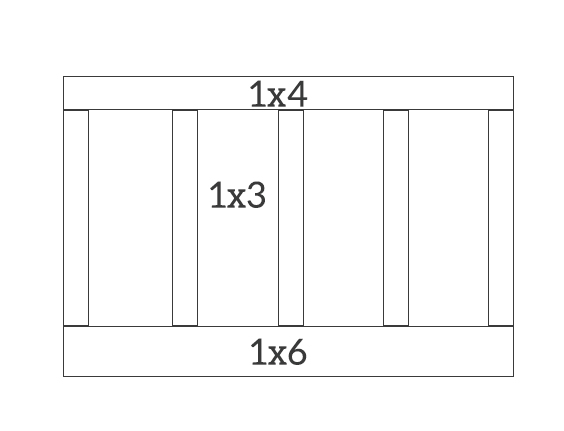
For the pieces that make up the board & batten, I used 1x4s on top, 1x6s at the baseboard and 1x3s as the vertical boards. If you decide to do this, you can certainly change things up a bit but I felt these were visually balanced.
For the record, a true board and batten has a board that covers the wall. Because of budget considerations and because my walls are in pretty good shape, I opted to forego the ‘board’ and just do the battens. I used MDF boards from Lowes.
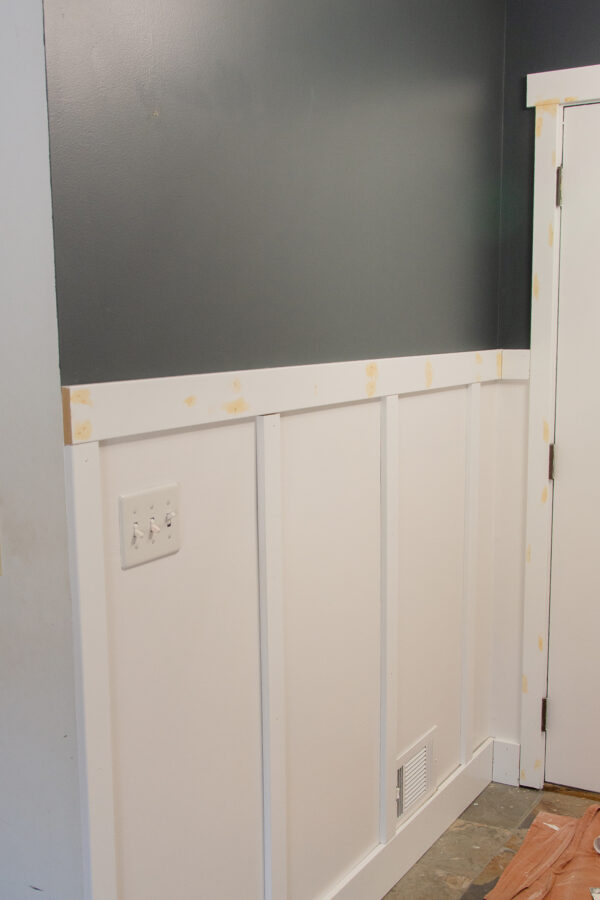
Once the level line is drawn and the painting is done, it’s time to install the boards. I installed the 1x4s first. Above all, take care to keep them level. To install the boards, I used a combination of Liquid Nails and my brad nailer. Next, I installed the 1x6s using the same method. I took care to nail into the studs on the horizontal boards. Finally, the vertical 1x3s. I measured each section of wall to determine the best spacing between the vertical battens. While I couldn’t keep them exactly the same, they’re close enough that to the naked eye, you can’t see a difference. It’s also important to note, not every batten will be on a stud. For those boards not on studs, aim the brad nailer at opposing angles to insure a tighter fit to the wall.
Budget
I haven’t spent a lot of time talking about the budget mainly because there isn’t much of one in this project. The majority of the budget in this room is invested in the boards. The 1x6s at the floor were about $6 per 8 ft. The 1x4s were about $4 each and the 1x3s were about $3 each. For my foyer, the cost was about $70. I used two gallons of paint for a total project cost of less than $140.
Finishing touches
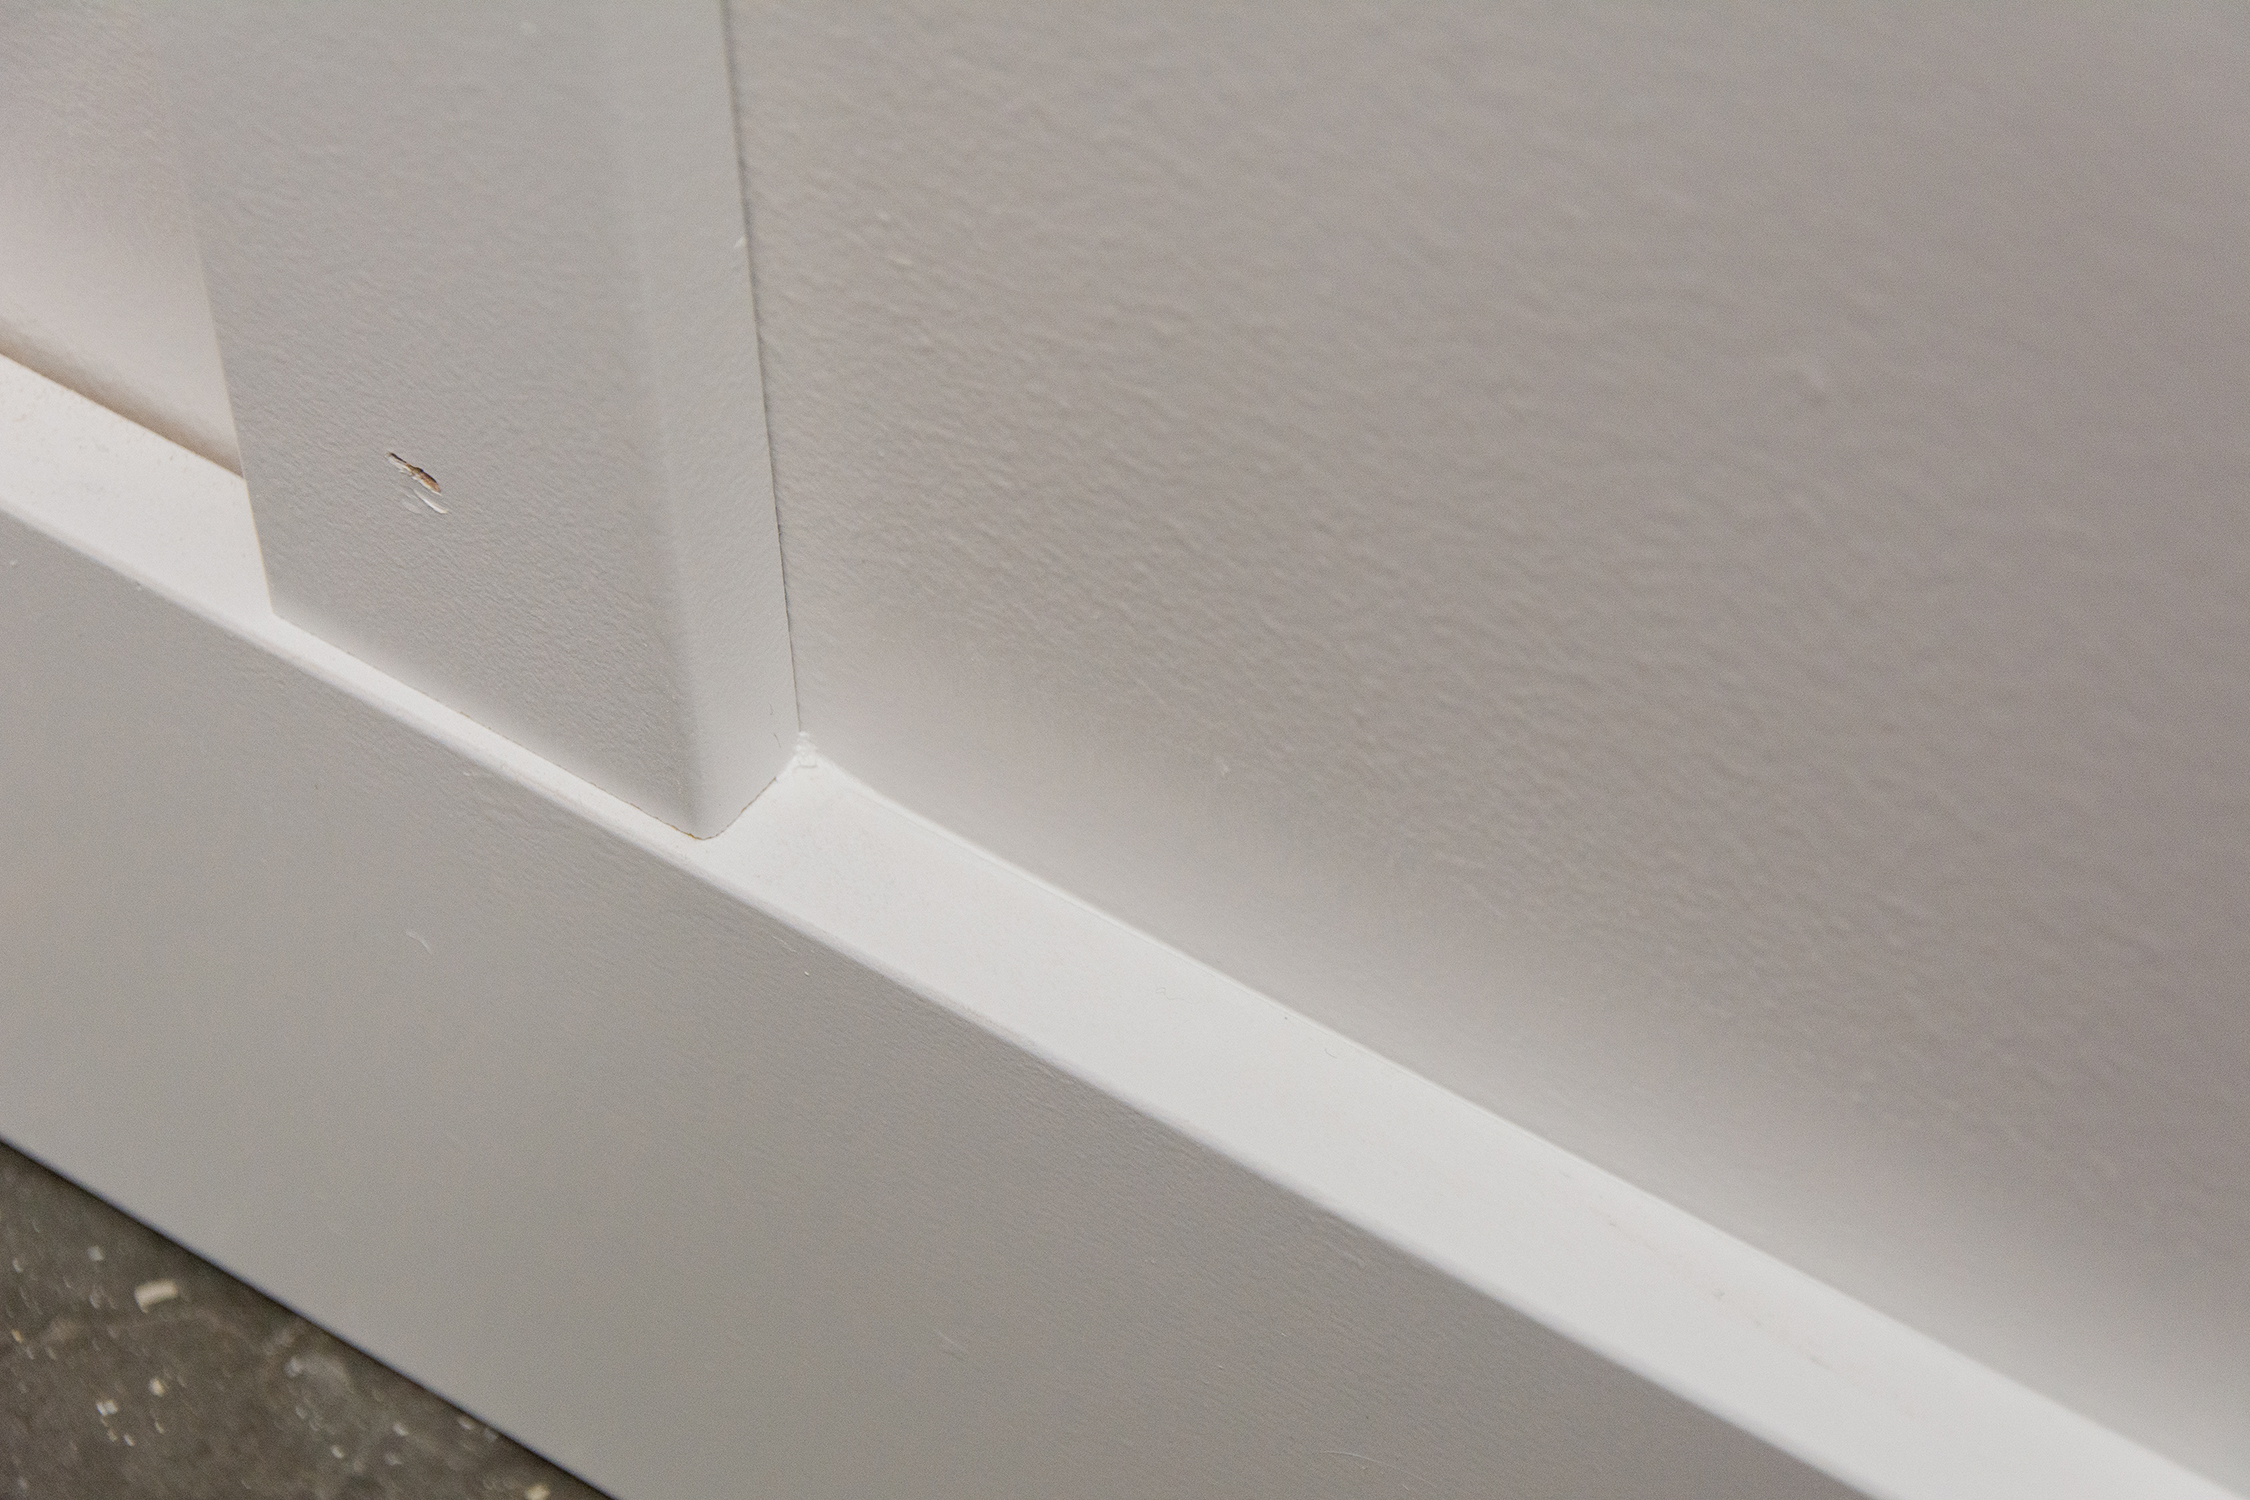
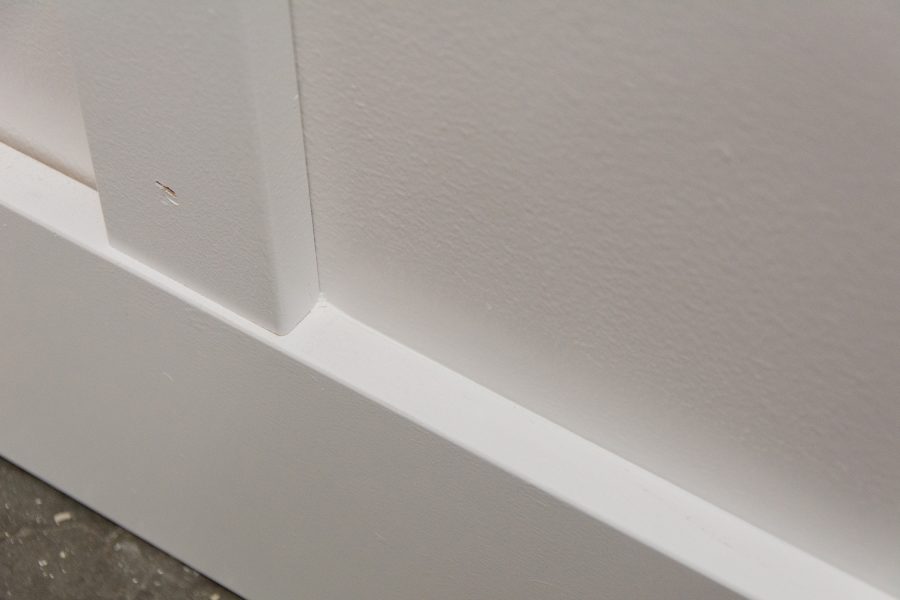
Once the boards are firmly adhered to the walls, fill the seams, sand and caulk the gaps for the perfect finishing touch.
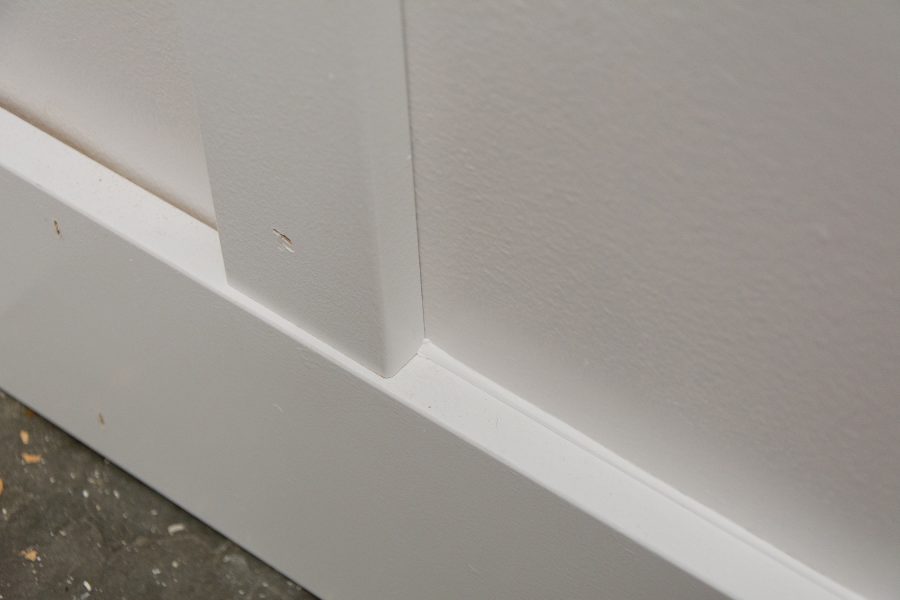
In the above photo to the left, you can see the gap between the board and the wall. Most walls, especially in old houses like mine, aren’t as straight as we’d like. Adding a bead of caulk (and smoothing it with your finger) fixes that issue easily.
Finished
Finally, I added a coat of paint on those boards and that DIY board and batten task is finished! Next up, I’ll share the finished room and we’ll talk about how to decorate such a small space.
XOXO
Donna
I love having you on the road with me!