Installing a laminate floor
It’s been about a week since I last posted. We spent nearly every waking hour last weekend putting the floor down and I’ve spent most of my time since… recovering. Turns out laying a floor requires some muscles I don’t generally use. I’ve made many old person noises in the last few days.
I didn’t put a lot out there about the floor. For one, I was afraid I wouldn’t have enough flooring & it’s been discontinued so there’s no more to be found. That would have been embarrassing. Additionally, I honestly wasn’t sure I could do it.
This was my most challenging DIY to date. My first challenge was the curved hearth of the fireplace.
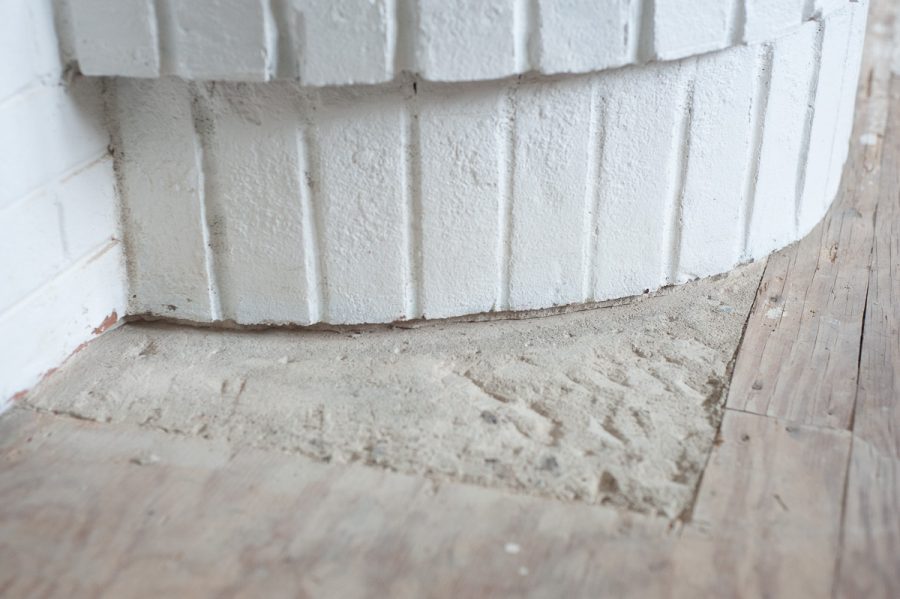
First, Andy and I had to chisel away at the concrete you see to make it even with the subfloor. That alone was enough to make me want to quit. I felt like I was on a chain gang or something. Over the long holiday weekend, Andy and I took turns chipping away the concrete.
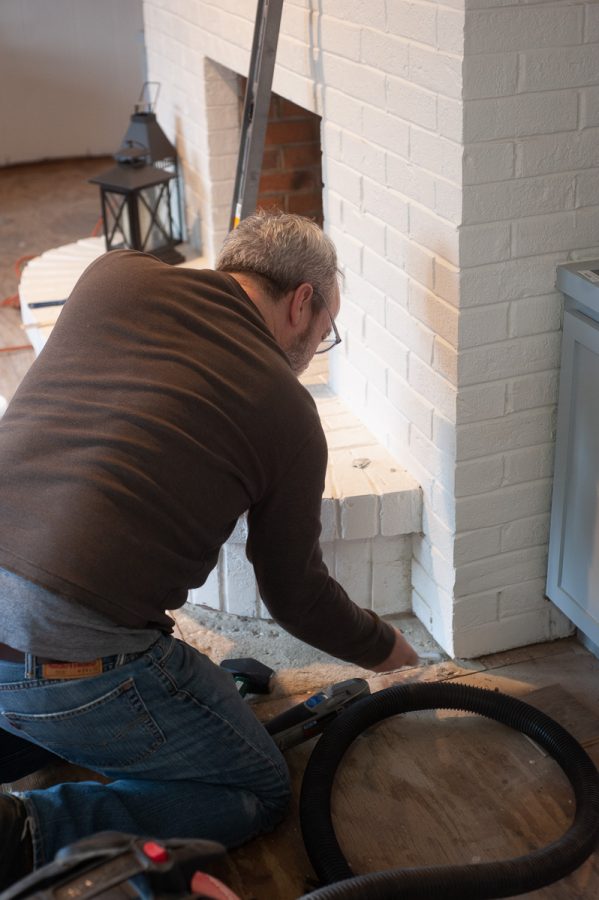
After the floor and the concrete were level, we had to create a channel under the bricks for the laminate to slide into. We were mainly removing mortar. If you look closely in the above photo, you’ll see a line of mortar between the bricks and the subfloor/concrete pad. While the chisel did a decent job, we knew if we wanted to actually finish this job, we’d have to get a better tool. We bought an angle grinder (also known as the scariest tool I’ve even been around.)

After creating the channel, we could start putting floor down.
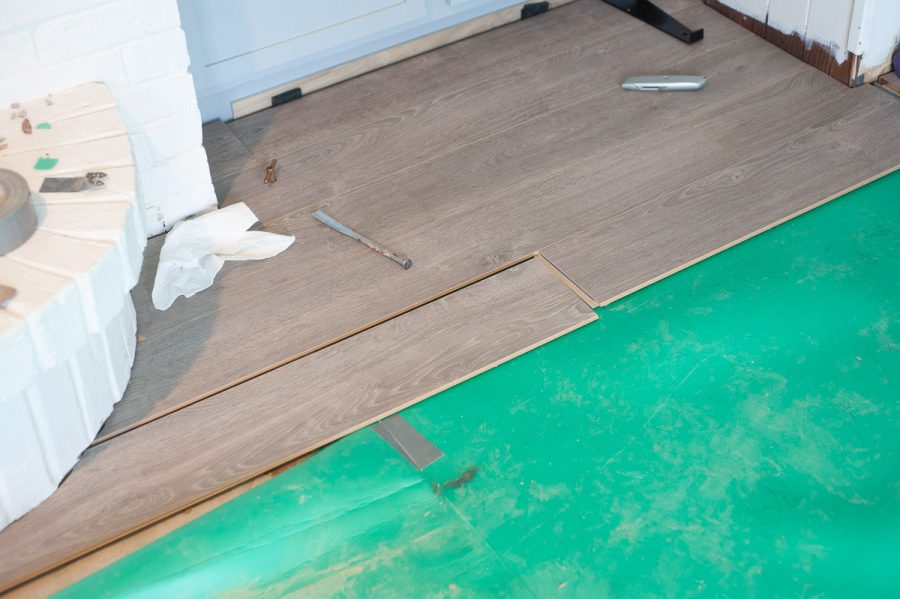
Laminate flooring is tongue and groove so you basically snap the pieces together. It is really easy unless you have curved lines like our fireplace or a less than level floor. Lucky us. We have both. The five rows you see above took us all day to do. I mean it. All day.
I made a template out of leftover Christmas wrapping paper to know how to cut each board. Even with Andy’s jig saw skills, we would have to tweak nearly every piece to make it fit. We ended up having to put most of the above area in while it was connected instead of a piece at a time. Again, I nearly quit. We had spent 3 days messing with concrete & bricks and now, I had a 4th day with very little progress. I was so frustrated! I went to bed on that 4th day wondering if I would have to bite the bullet and hire someone to do the job.
I took a couple days away from the floors. I did my day job. I putzed. I avoided. I’d look at it. I’d try to think of an easier way. Then, I went back to it, determined to finish. Saturday morning I started again.
Turns out the left side of the hearth wasn’t nearly as challenging as the right side. It wasn’t easy… but it was doable.
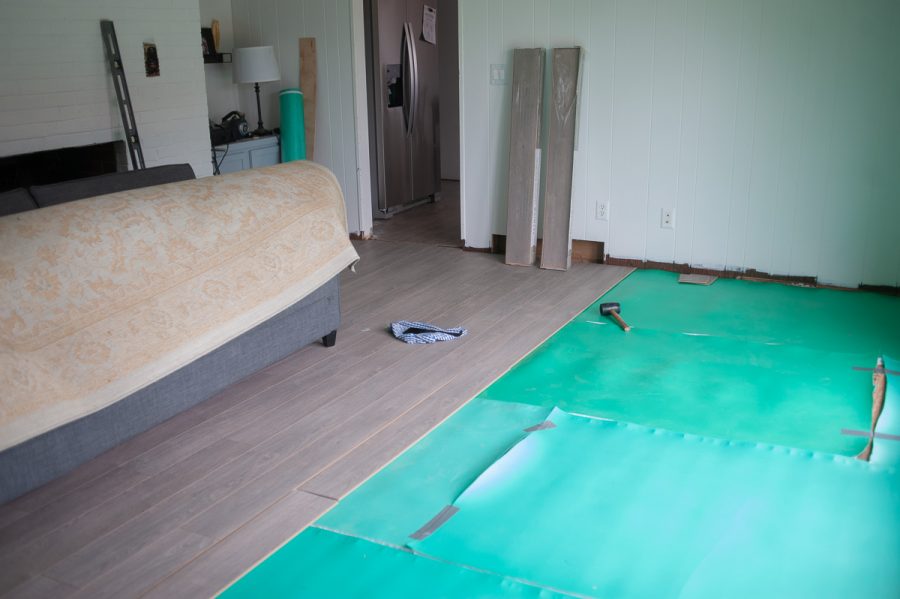
Once I got both sides of the hearth taken care of, it started to move a LOT faster. I was challenged at a low spot in my subfloor and again… nearly quit but by this time, I had invested too much to stop now. My hands hurt from gripping the boards. My muscles ached but I was more determined that ever. This floor was NOT going to beat me.
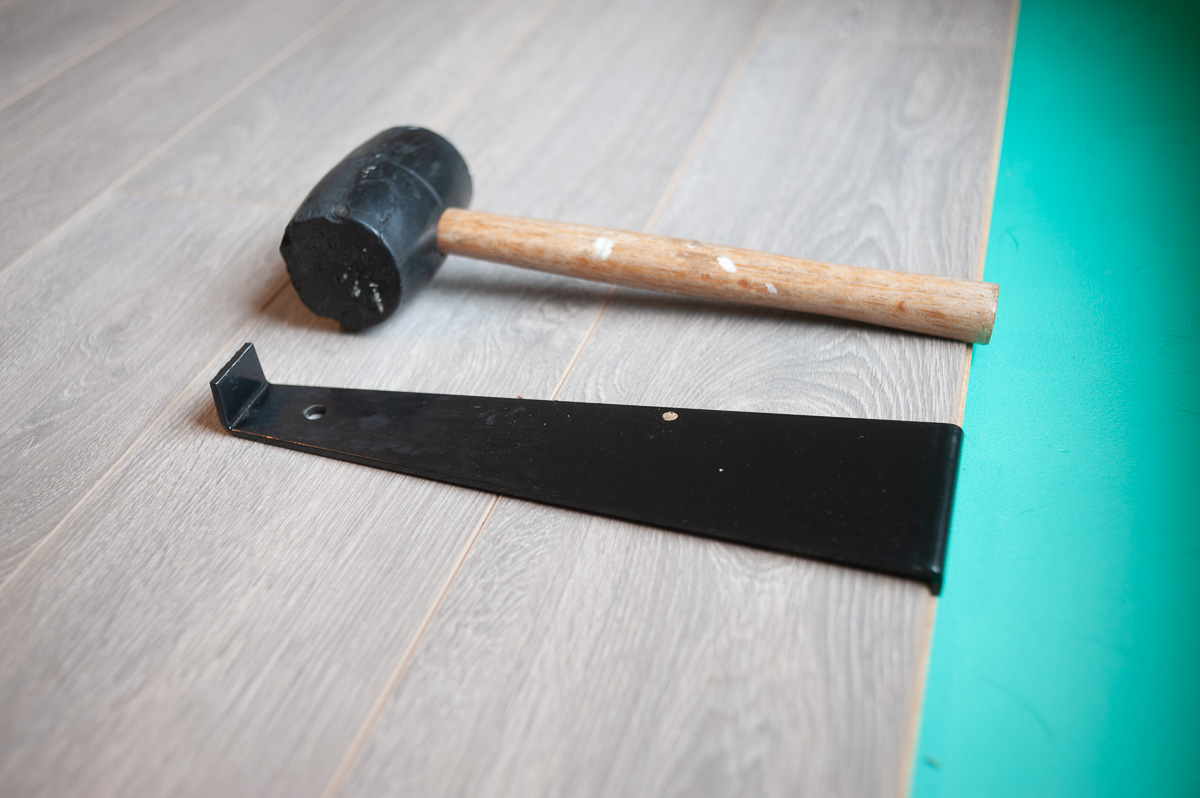
About the time of the above photo, I fell in love with this tool combination.
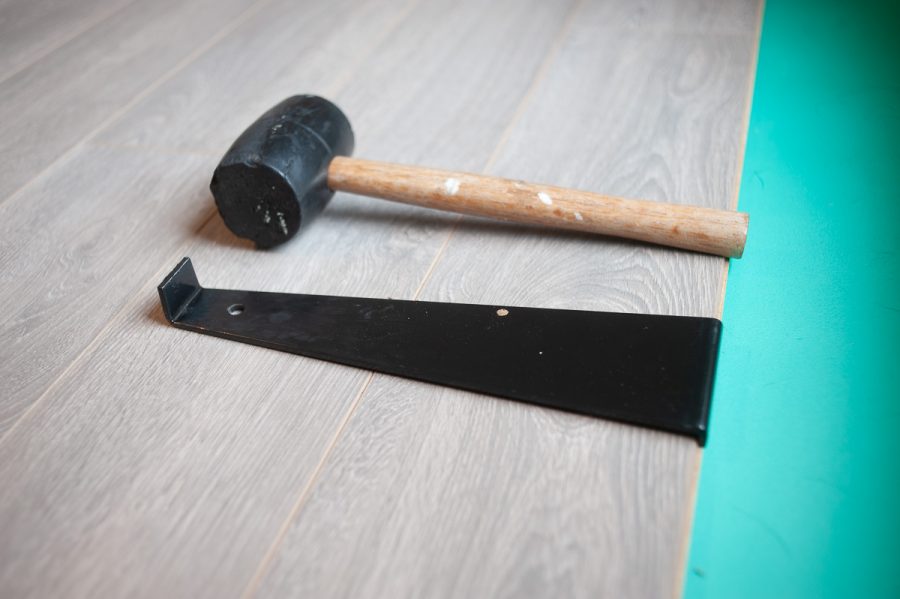
I should probably know that name of it. I don’t but I can tell you what it does… It makes those boards lock tightly together and you can take a little DIY frustration out in the process. Place the tool on the lip of the board and bang it with a rubber mallet. It forces the boards together, locking them tightly together. It’s magic.
Over the course of last weekend, we finished the floor. We avoided my biggest fear of not having enough floor. Most importantly, I DIDN’T QUIT!!! I really did DIY this floor and despite all the challenges, it was worth it! It has made a huge difference in this room and I’m looking forward to sharing more with you soon.
xoxo
Donna
I love having you on the road with me.