DIY Herringbone table part 1
Part One
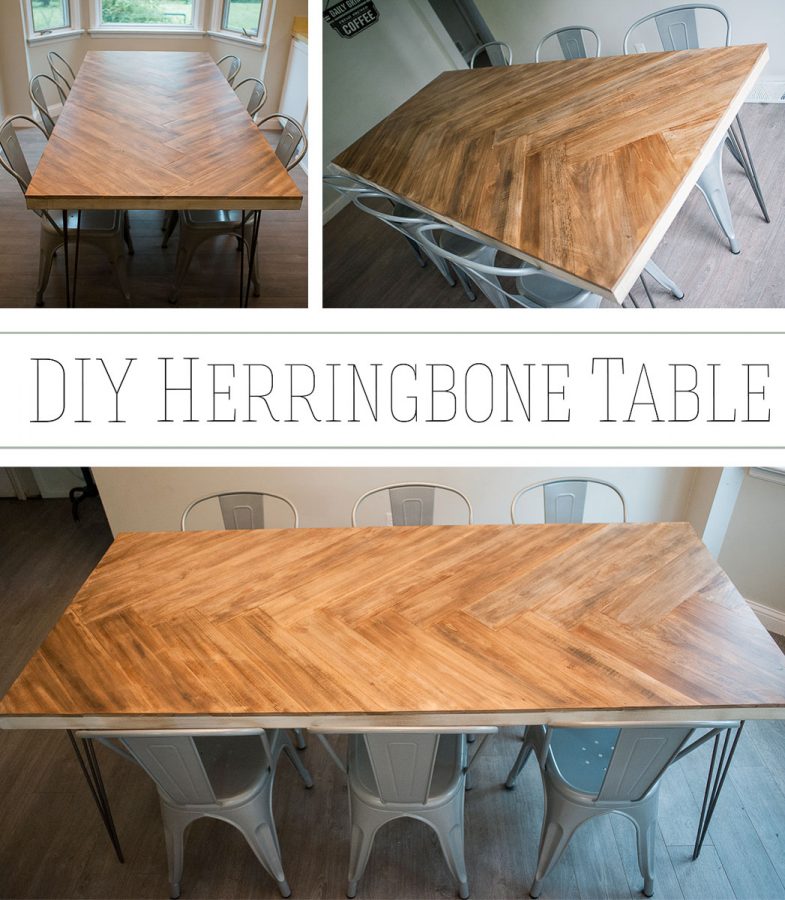
As I told you in my last post, I began to have kitchen table envy. I wanted a better size table and honestly, I also wanted a more stylish option. My old table didn’t really ‘fit’ my newly designed kitchen. When inspiration struck, I decided to try a DIY herringbone table to fit the space. Because it was successful, I’m sharing a tutorial so you can make your own table.
Tools I used
-One 36″ x 80″ solid core door
-Hairpin legs (I bought THESE but HERE is a comparable set on Amazon.)
-14 pieces of 1/2 inch x 6 inch x 4 ft. poplar project board from Lowes.
(Feel free to use other sizes or types of wood but adjust your quantities and leg heights accordingly)
-2 packages of Liquid Nails Heavy Duty
-Nails (I used a nail gun but you can hand nail these)
–Stainable Wood Filler
–Minwax Pre-Stain
–Golden Oak Minwax Stain
–True Black Minwax Stain
–Minwax Polycrylic
-a half pint of each Minwax product was enough for the table.
-Sander or Sandpaper
–Staining Pad
Prep the door
First, prep the door by sanding it. My particular door used to be my desktop (in case you’re wondering why it’s white). I sanded the top but left the sides with some texture to make it look older. Next, decide where you want your first board to be placed. One portion of your board will hang over the edges of the door.
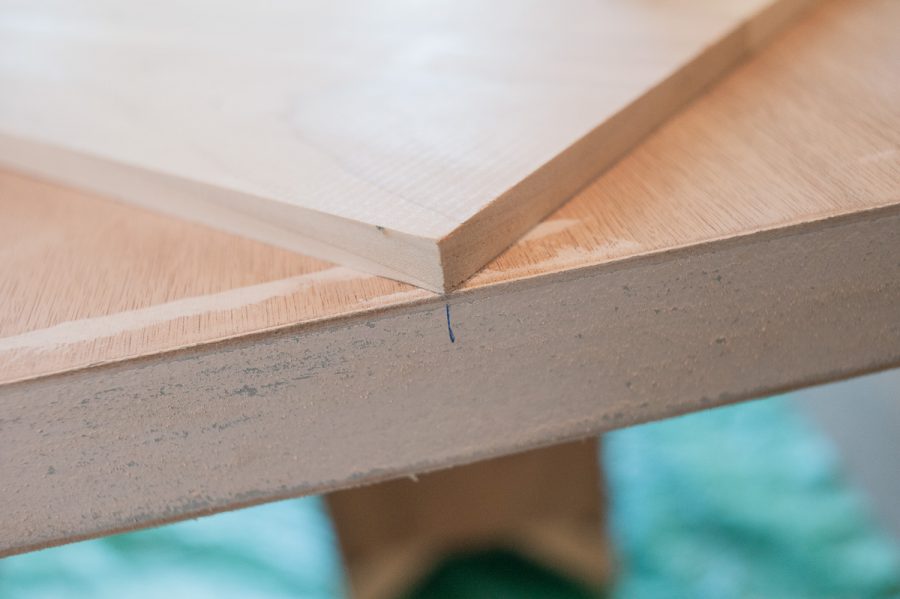
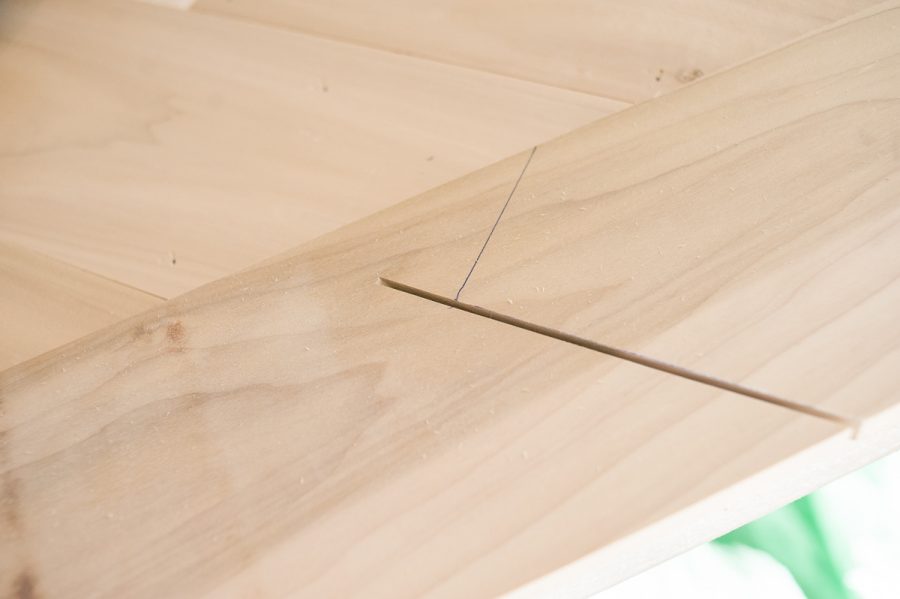
Once you determine placement, draw a cut line on the underside of the board.
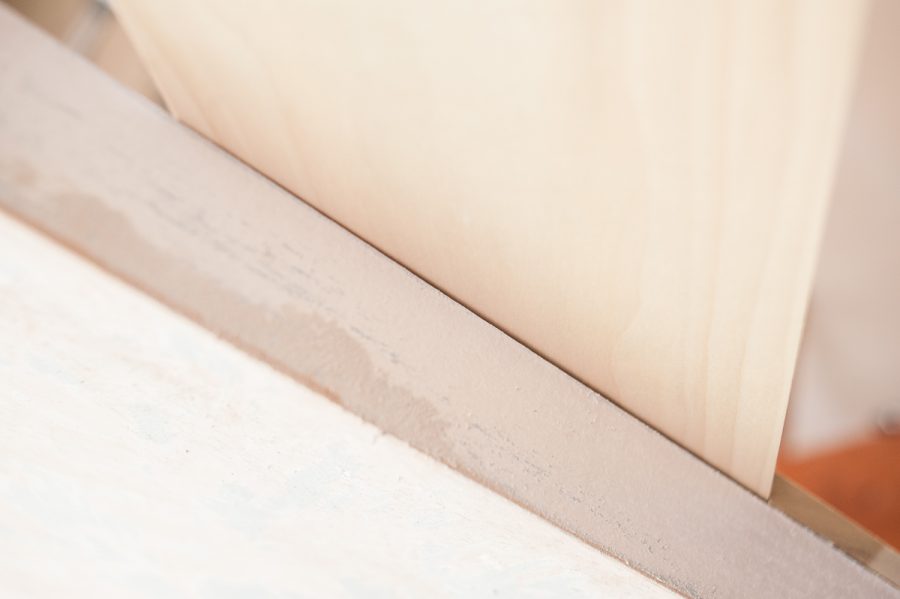
Using a miter box or a chop saw, cut along the line. I found it was important to pay attention to which side of the line is the scrap wood and which side is being kept. Cut on the side of the line that is the scrap wood!! It helps with consistency and accuracy, making the side of your table smoother.
It’s important to note, many carpenters will tell you to measure angles and cut using the angle measurements. I encourage you to use whatever method works best for you. For me, I found this method to work well. It forced me to slow down and pay attention. As long as you pay close attention to which part of the wood is your scrap and which part is your table, you will do well.
Affix your boards to the door
Once your first piece is cut, add Liquid nails to the underside
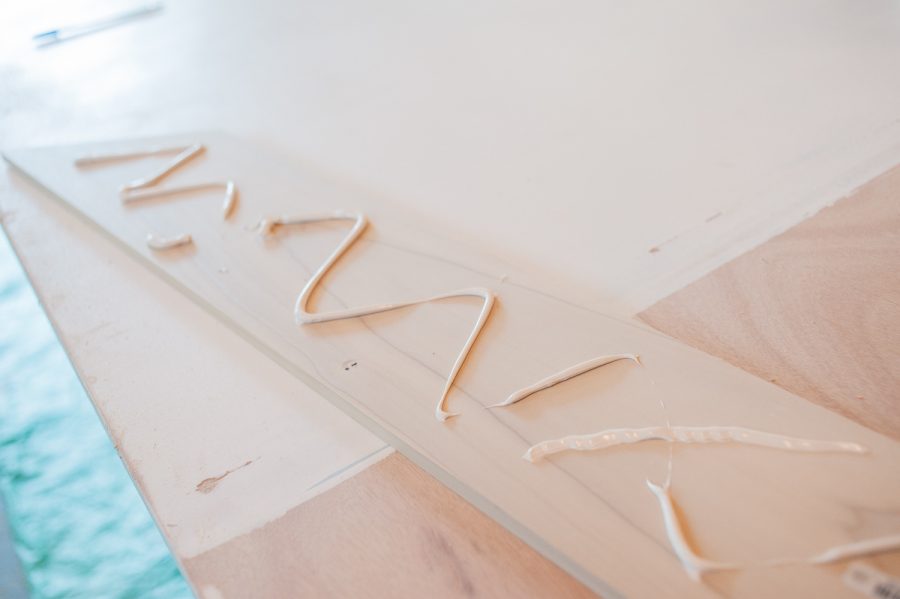
Place the board in position on the table. Nail it down. I put 6 nails in each of mine: in the 4 corners and 2 in the middle. The second piece of wood needs to be placed up against board #1 creating a 90 degree angle.

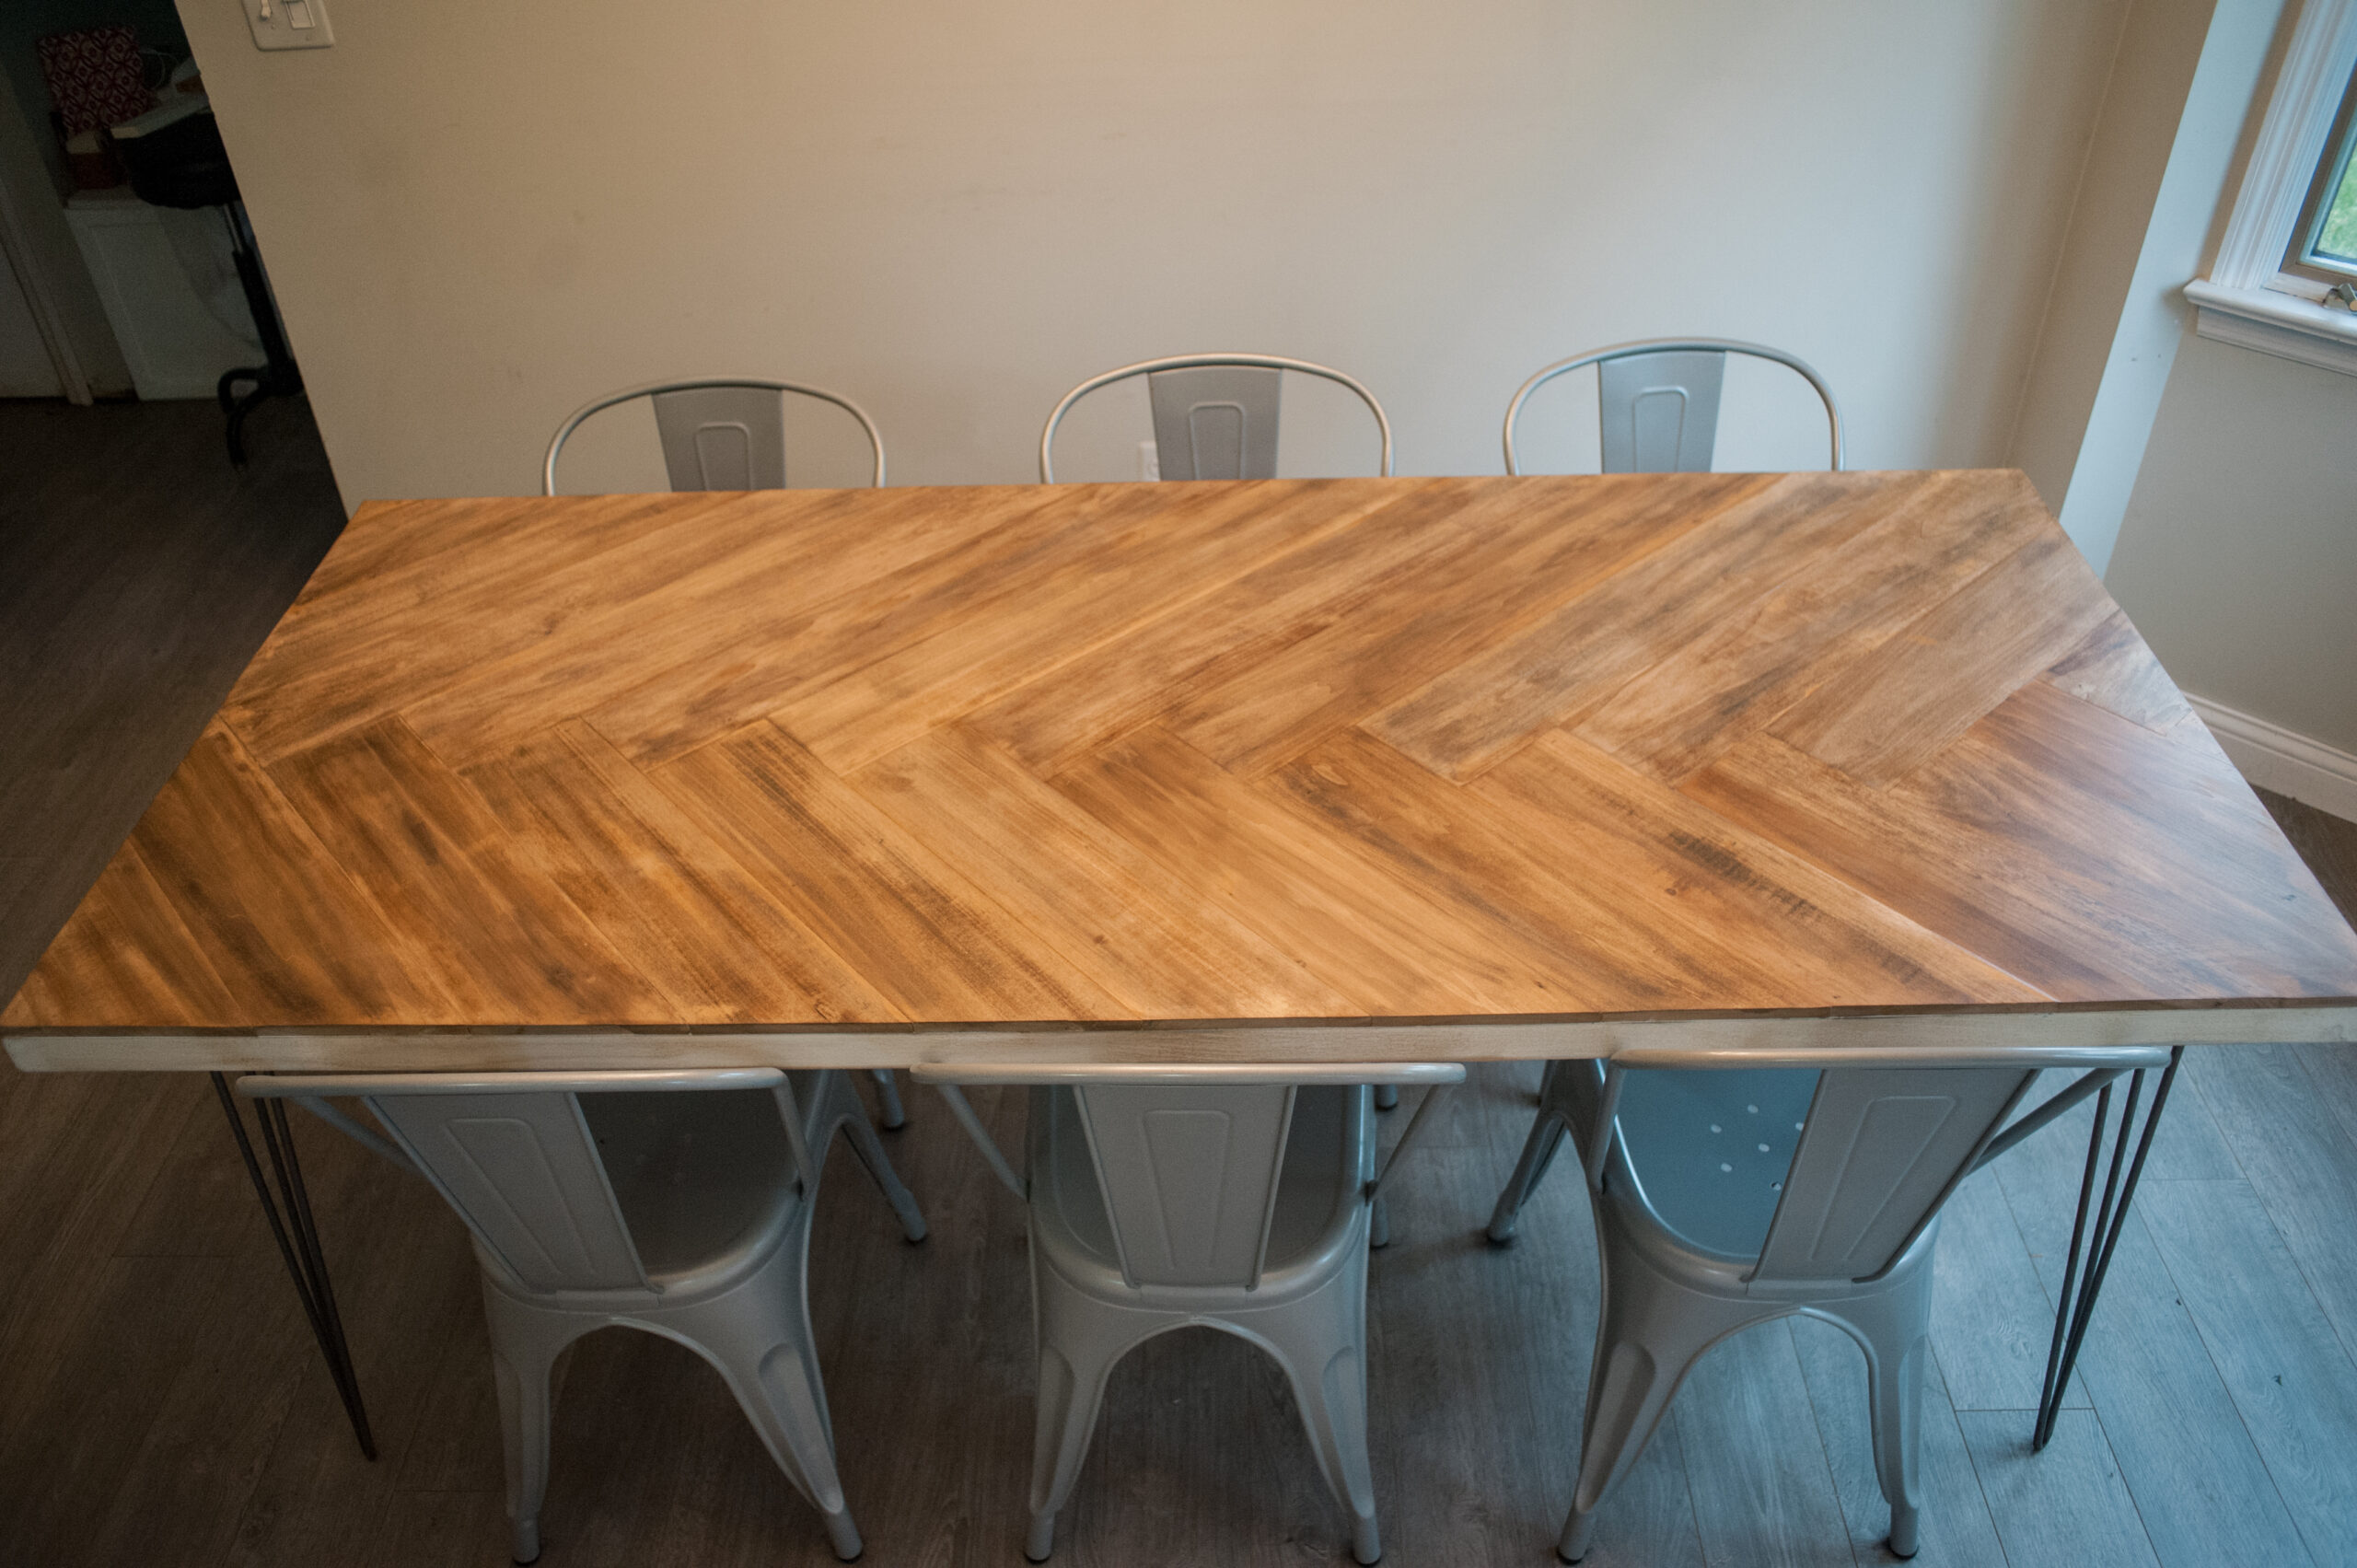
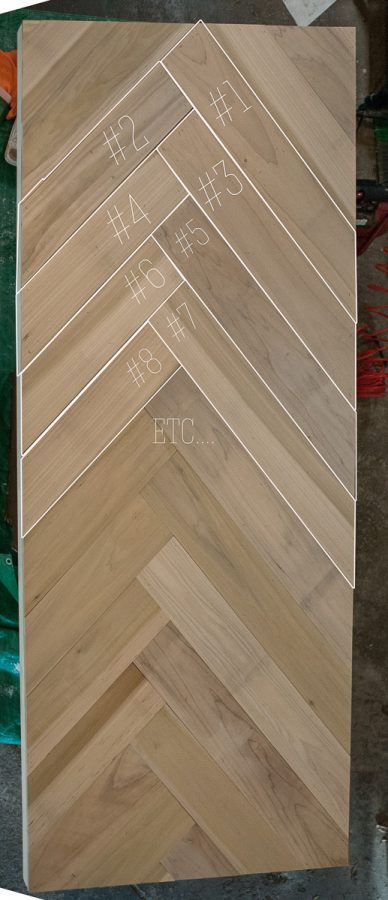
Repeat these steps for each board: Place the board. Draw a line of where to cut off the excess board. Cut the excess board. Add Liquid Nails to the underside. Nail the board to the door. See below for a diagram of how I placed the boards. Notice how I alternated which side of the table the board would be placed. That’s key to the pattern. (And yes, if you look closely, there is a flaw in my pattern. I think I got excited to be done.)
Repeat those steps until you reach the corners of the table. At the corners, you will have to make two cuts on the board.
Eventually, as you fill the table with boards, you’ll reach a point where you have one small triangle to fill at one end of the table and a couple of boards at the other end of the table that need two cuts. This is the trickiest part. Again, draw the lines from the underside of the table and pay very close attention to what you’re keeping vs. what is scrap wood. Continue gluing and nailing until your door is covered with boards.
Rest… You just played a heckuva game of Tetris otherwise known as creating your own DIY herringbone table. Let the glue dry and then we’ll dive into Part 2.
xoxo
Donna
PS… If you like what you’re reading, you can subscribe. Love having you on the road with me!