Refinishing a door

If you follow me on instagram, you probably saw this beauty.
After my uncle’s funeral and a trip to Florida to see my father-in-law, I decided it was time to bring this baby back to life. I started by removing the hardware. How about that for vintage?
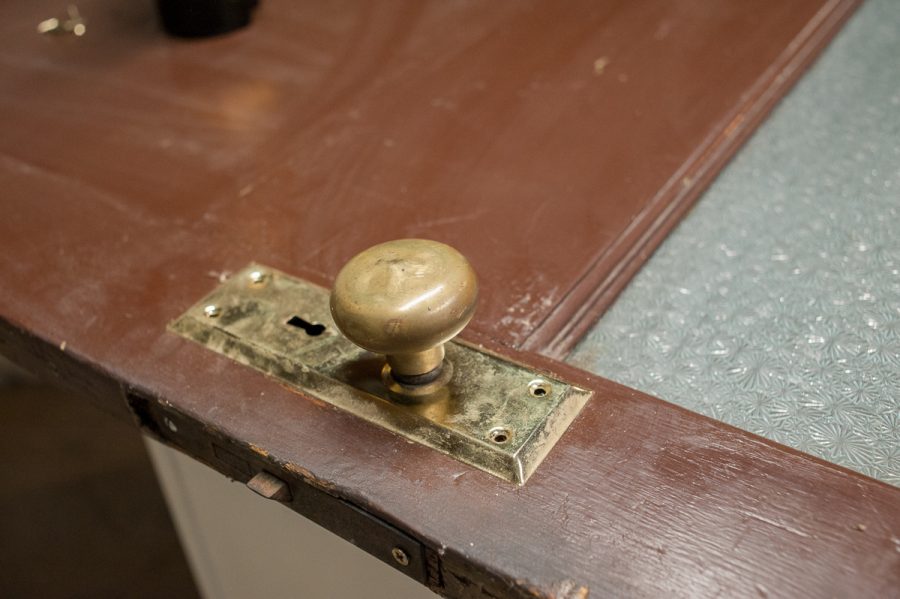
The trick to removing it was a screw on the knob itself.
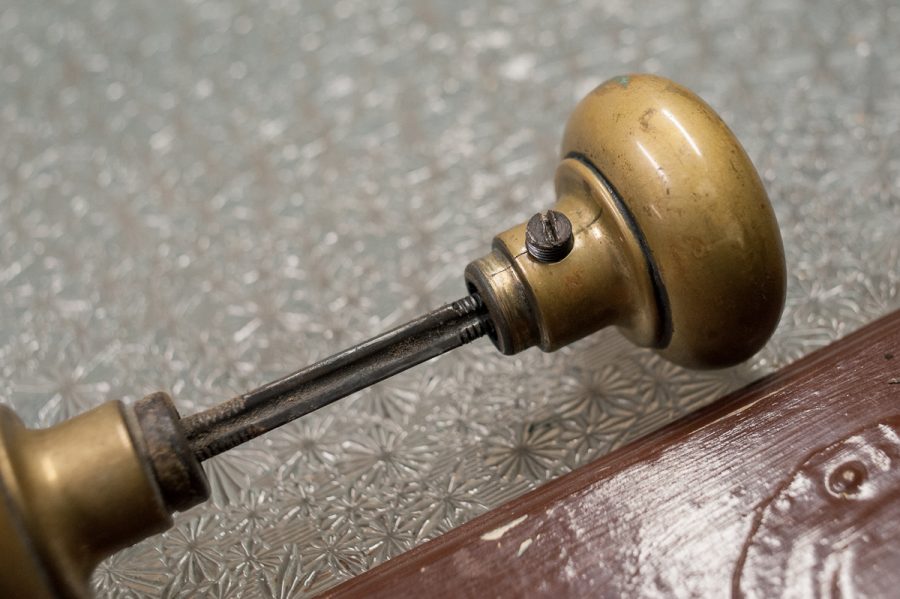
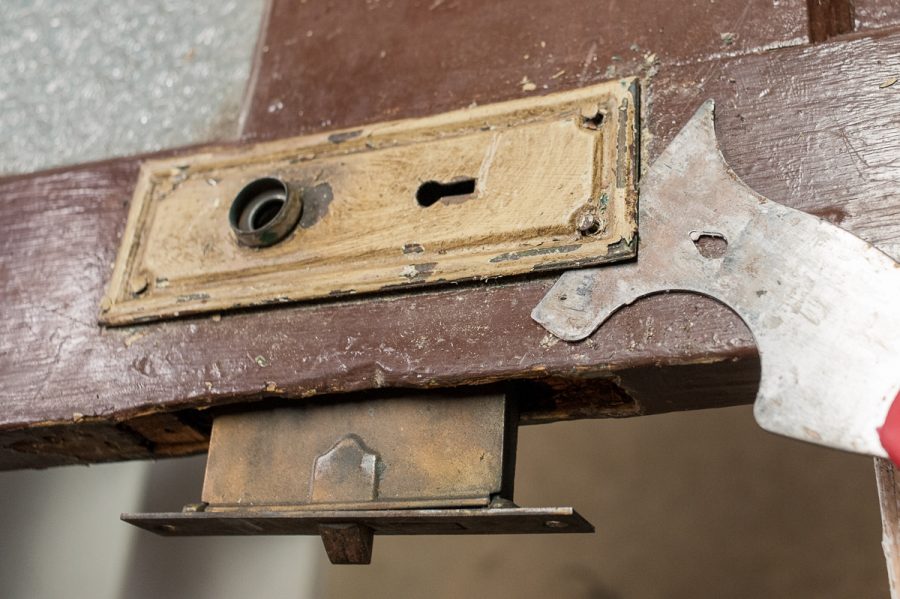
I could remove the plate on one side but the other side required some prying. It was held in with nails. This is seriously vintage hardware.
After removing this hardware, there was one odd piece that also needed to go: a soup can lid. Seriously.
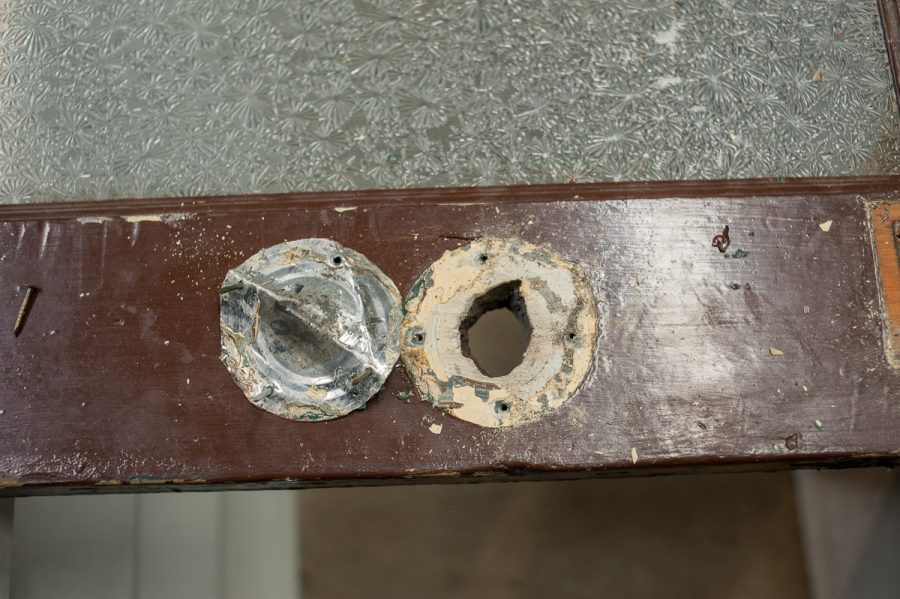
I know. So weird. Well… A soup can lid wasn’t the worst of it. This is where things took a turn for the worse, which seems to be a theme in this house. Looking at the multiple layers of paint & the condition of the door, I knew I needed to strip it instead of sand it.
Folks… This is not a job for the impatient or the lazy. I found 4 layers of paint: brown, green, yellow and gray. It’s a slow process.
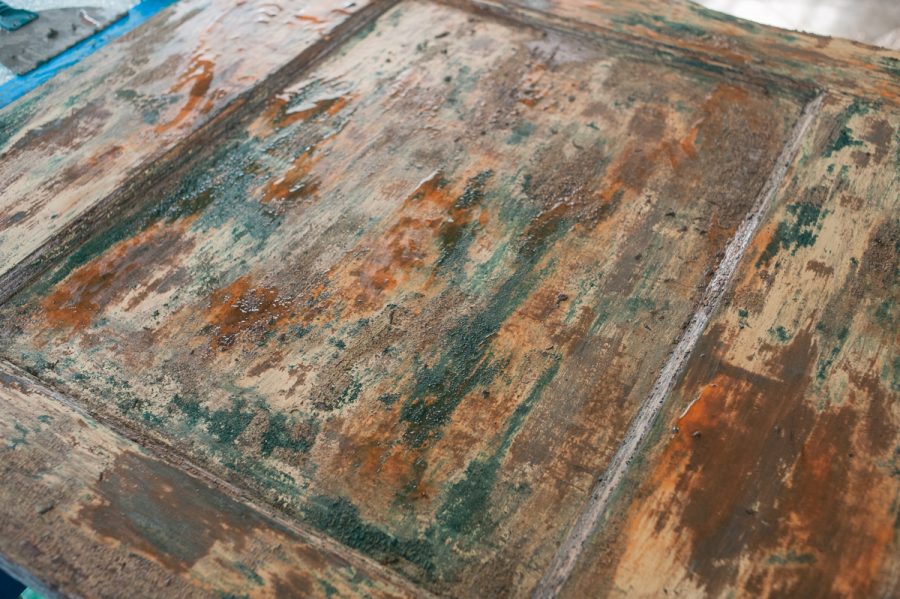
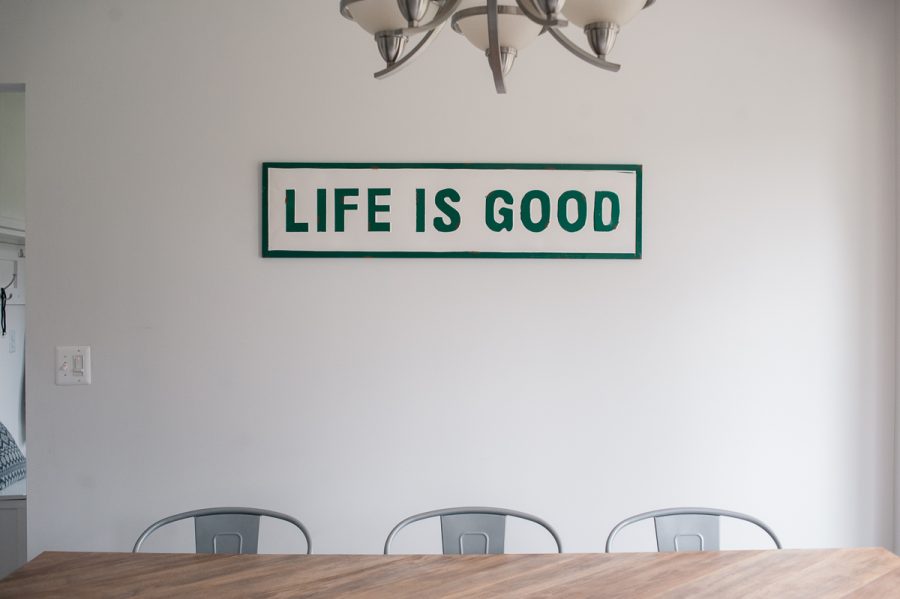
But… Check out that green!! Um… That would look awesome with the sign I picked up on our road trip.
Maybe when I’m done, I’ll paint this door green. Or maybe, after all that work, I’ll want to keep the wood color. Tune in later to find out what I do but please drop a comment below and tell me what you’d like to see: a big pop of green or nice, warm wood?
xoxo
Donna
I love having you on the road with me!

Tess Robinson
If you’re stripping it all the way down to the wood, I say leave the natural look! You can always paint it green later! Also… I watched an HGTV show the other day where they did a “dip & strip” on a door…. took it to a place where they literally “dunk” the door in the chemicals! Not really too DIY, but w/all those layers… ???